Replacing a shower valve starts with identifying whether it’s single-handle or multi-handle. Gather the right tools, compatible cartridges, and replacement parts. Shut off the supply and relieve pressure before removing the old valve. Label each component as you go and inspect for wear. Install the new cartridge or valve body in the same orientation as the original. Reassemble, test for leaks, and check temperature control. If issues persist, a professional may be needed to ensure safe operation. Proceed with care.
Identify Your Shower Valve Type
Identifying the correct valve type is essential before any replacement work. The procedure centers on observation of the valve body, handle, and cartridge style. Determine whether it is a single-handle or multi-handle system, and note any indicators of press-fit or screw-in components. Consider installation context: floating vanity visibility and tile pattern cues aid accurate classification.
Gather Tools and Materials for Replacement
Gathering the appropriate tools and materials is the first practical step before any valve replacement. A user-focused kit should include basic pliers, adjustable wrench, screwdrivers, and a flashlight, plus replacement components.
Verify gasket compatibility and confirm cartridge sizing with the valve model.
Gather thread sealant, plumber’s tape, and a bucket for drainage to ensure a clean, efficient workflow.
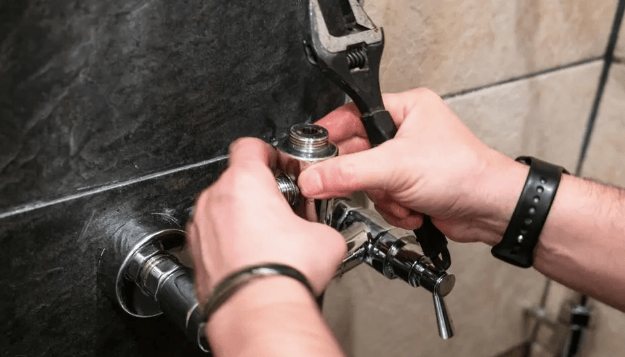
Step-by-Step Valve Removal and Installation
With the necessary tools and materials on hand, the removal and installation proceed in a structured sequence. The technician identifies the valve type, shuts water, and relieves pressure. Components are labeled, detached, and inspected for wear. Replacement parts are aligned, fixtures tested, and reassembled. Discussion ideas guide decisions, unrelated to H2s, while considerations on valve replacement philosophy and water pressure ethics remain outside scope.
See also: The Rise of Influencer Technology
Test, Troubleshoot, and When to Call a Pro
To test a replaced valve and diagnose issues efficiently, the technician follows a concise, methodical checklist: verify supply lines, recheck for leaks, and confirm proper operation of each control.
If readings diverge or noises emerge, idea one guides evaluation: test flow rates at different temperatures.
If problems persist, idea two recommends professional inspection to ensure safe, compliant function and long-term reliability.
Conclusion
Replacing a shower valve properly hinges on correct identification, careful disassembly, and exact reassembly of parts in their original layout. By labeling each component, ensuring compatibility, and testing pressures and temperatures post-installation, leaks and inefficiencies are minimized. If readings drift or leaks persist, seek professional guidance to prevent water damage or safety risks. Are you confident the valve matches the system and that all connections are secure before restoring service? Proceed methodically to ensure reliable, long-lasting performance.